

How To Save Anim As Gif Blender
Blender how to create an animated gif
In this tutorial we will run into how to create an animated gif in Blender (updated to Blender 2.8) using the Bligify addon.
The Graphics Interchange Format (GIF) was invented many years ago, in 1987, and in the 1990s information technology was one of the few methods to insert an blitheness into an html page, but later fell into disuse due to the emergence of new technologies, such as Wink and HTML5. With the advent of social networks, chats, and advanced messaging (Whatsapp, Telegram, Messenger etc.) and the spread of MEME fashion, all the same, the importance of spreading blithe graphic files that were light and readable by all players, thus causing the revival of the GIF format.
Prepare the movie to convert:
You tin can get a gif from both a movie and a sequence of images, which tin incorporate for example an animation created with Blender (therefore indirectly we as well reply the question "how to return animations created in Blender in gif format"), in our case nosotros volition save in gif format a slice (whatsoever one, without whatever particular meaning) of the brusque film Spring, fabricated by the Blender Animation Studio (in our instance the resolution of the movie is 1280x536 with 24 frames per second).
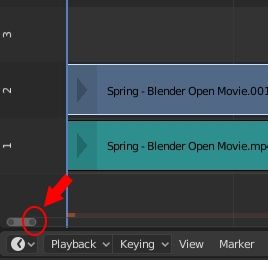
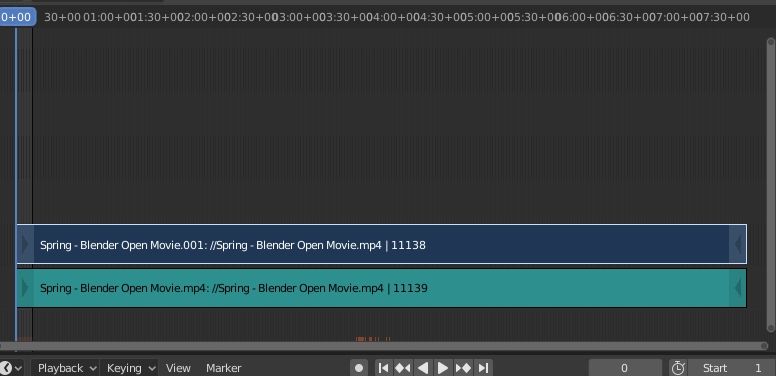
Nosotros start Blender and create with File > New> Video Editing a new project with the "Video Editing" workspace already selected

we import the picture "Spring" with Add > Picture

and load information technology into the channels of the Video Sequencer.

The number of frames per 2nd of the video is 24, and then we set this value in the "Frame Rate" field of the "Output Properties" tab, in the Properties Window at the meridian correct

The portion of the film that interests us ranges from five:24 to 5:27 minutes but nosotros see to a higher place 0+01, 0+08, ..., 1+08, ... ii+xvi etc., which correspond to the "number of seconds + the number of frames", in club to piece of work more comfortably on the movie we therefore need to zoom out of the movie. To exercise this we accept multiple possibilities:
- utilise the mouse bicycle to zoom out (scrolling many times :D)
- press the minus key "-" on the numeric keypad
-
elevate the slider of the bar, located at the bottom, to heart the movie
-
select the video strip and printing "." in the numeric keypad to arrange its view to the window (yous can use the mouse wheel later to better resize information technology)


Let usa now cut out the portion of the movie that we want to convert into a gif: nosotros tin can position the cursor, which is located to a higher place the channels, corresponding to the value 5:24+00

or calculate the position directly, obtaining the number of seconds (5 * 60 = 300 + 24 = 324) and multiplying them past the number of frames per second (324 * 24 frames per second = 7776), writing the effect in the timeline and pressing ENTER

With the left mouse push we select the video and audio track (when selecting a rail, e'er click in the eye, otherwise the side handles are selected), property down the SHIFT button, and we press the SHIFT+K keys to cut

We position the cursor at the end of the picture nosotros want to cutting, that is to say 5: 27 + 00, or we calculate its frames (v * lx = 300 + 27 = 327 * 24 = 7848)

Nosotros select the video rail and the audio track, with the left mouse button keeping the SHIFT key pressed, and we press the SHIFT+K keys to cut

at present select the other parts of the movie

and delete them by pressing the "X" key

Let's at present bring the film to the start of the channel: we had calculated that the interesting portion started after 7776 frames, and so just select the audio and video track and move them to the left, pressing 1000 and Ten (horizontal movement), writing -7776 + ane = - 7775, because the frames are displayed by the number 1, and confirming with the ENTER cardinal.
Allow's zoom in and see

The full animation lasts longer than the movie, which is long (because the values calculated before) 7848-7776 = 72 frames, therefore nosotros write 72 in the "End" field of the Timeline, thus adapting the animation to the picture show.

Add an inscription:
To create a Meme you may need an inscription, which nosotros will add from the VSE menu with Add > Text

and a new track will exist added to channel number three

We can move the text trace to frame number eight, dragging it with the mouse, and use the property window on the correct (activated past pressing the "Northward" key) to customize it appropriately

Has been added to the text field "Cute!", loaded the Arial font (from the Windows "Fonts" directory), the text has been enlarged upwardly to 195; for the writing the fundamental horizontal alignment was chosen so positioned not in the center (0.five) only slightly out of stage to the right (ten: 0.53). For vertical Y coordinates, a lesser and y: 0.04 alignment was called
Plough the film into a gif:
To create an animation in gif format, starting from a movie or a sequence of images, you can usually either use specialized software for this function or generic applications for 2D graphics, such every bit GIMP or Krita.
Blender cannot consign direct to the gif format, however the Bligify addon can be used, which can be downloaded from https://github.com/doakey3/bligify

On the same page, at the bottom, yous can find a guide and installation tips; in fact, to install the addon y'all must also download the executables of the ImageMagick software (necessary to convert the images) and Gifsicle (which is used to create the animated gif).
For example, if you are using the 64-bit Windows operating system, you tin can click on the relevant link "latest release"

on the post-obit page you can download either the latest version of the addon, "bligify.null", or the addon and executable files that carry out the conversion, contained in the "bligify_windows.zip" file.

So download "bligify_windows.nix".
Now install the addon: select in the menu Edit > Preferences and in the tab "Add-ons" click on the button "Install"

look for the bligify_windows.zip file that we had saved before, load it and actuate it

As you can meet in the figure, in the "Preferences" in that location are "Gifsicle Path" and "Magick Path" since, in improver to the installation of the python scripts, the 2 executables that will exist used for paradigm transformations are extracted and saved.
In the Backdrop Window we set the "X" and "Y" resolution in "Dimensions", which is recommended to exist configured equal to or less than that of the original pic (with the same proportions), as output a sequence of PNG, with activated alpha aqueduct (RGBA), which we will need later

Nosotros salve our projection with the proper noun "tutorial.blend"
In the properties panel on the correct of the Video Sequencer aqueduct window, the one that can be activated by pressing the "Northward" button, select "Tool" and by clicking on the pointer we expand the Bligify options

Press the "Render GIF" push and choose the directory in which to insert the generated gif file. The addon with its executables will create in it a temporary directory "proper noun of the file blender"_frames, in our case "tutorial_frames" and insert the temporary png files (whose properties nosotros had configured earlier)

which will then be converted, one past one, into the corresponding gif files

which volition eventually exist merged into one animation

which you can also preview using a browser

Bligify parameters:
Very often you can create an blitheness without considering the parameters of the addon, but sometimes you lot can feel the need either to optimize the size of the images or to create particular graphic furnishings, and so let's now analyze the various options:

Disposal:

Indicates which disposal method to employ for frames, i.e. what to do with what is contained in the electric current frame when moving to the next. For instance, if we take to relieve the animation of a cube move with a transparent background in gif format, if we cull the "Previous" option at the end of the display of the current image, it brings the state of affairs back to the way information technology was before the image was overlapped, then deletes the cube from time to time and adds the cube to the side by side position, displaying merely ane cube frame by frame.

With the "None" selection, no disposal volition be carried out and the images of the private frames will simply be superimposed

Dithering:
Due to the limited number of colors available in gif images, compatible stripes are formed in the conversion from millions of colors to 256 (or much less) which correspond a loss of information. To overcome this, the dithering method was introduced, which adds "noise" to the prototype, better approximating the smallest details, the shadows and the nuances.
A high granular dithering better defines the figures just increases the weight of the file, therefore depending on the blazon of image (if it is solid colour it is not necessary to employ it) a different processing algorithm may exist more suitable.

Filter:
allows you to select the mode in which a map with fewer colors volition exist chosen, which tin can be a simple subset of the original one or chosen in other more sophisticated ways

Map:
instead of computing the map automatically through an algorithm, it allows you to select the type of map to use: a map suitable for displaying colors correctly within a web page, regardless of the operating system, a grayscale color map

a black and white map, or allows you to upload a custom color map (through the "Map File" below)

By continuing to expect at the parameters below:

"Careful" allows you to avoid some bugs present in some players, "Loop" indicates the number of times the blitheness tin can echo itself (setting a value of zero will cycle it infinite times), "Optimize" where you select the type optimization, saving only the changes inside the animations or only the non-transparent function of the image, and finally "Colors" which allows you to choose 256 colors, or less, to decrease the file size even more.

We saw before that the movie was first converted into a sequence of PNG images, which were then transformed one past 1 into GIF. The option "Dither Conversion" requires to add together to the PNG the dithering in the conversion to GIF images, selecting instead "Cleanup on Completion" the directory containing the PNG images volition be deleted in one case the cosmos of the GIF blitheness is finished.
To brand the concluding animation file even lighter, you tin can force the subtract in the number of frames per second by entering the new number in the value field to the right of the "FPS Suit" confirmation push button.
Past pressing the "GIF Import" button yous can import a GIF, image or animation file into the channels.
We accept already talked nearly the "Render GIF" push button, as information technology is what is used for creating the animation.
Here ends this tutorial for exporting Blender animations, or movies, to gif files; experiment and enjoy creating your memes. Happy blending!
Source: https://www.graphicsandprogramming.net/eng/tutorial/blender/the-video-sequence-editor/blender-create-animated-gif
Posted by: kwanparmlaidern.blogspot.com
0 Response to "How To Save Anim As Gif Blender"
Post a Comment